NFT Hydroponics
NFT Pea Shoots: Pruning & Training in Wooden Crate Hydroponics
Learn how to pruning pea shoots NFT hydroponics wooden crate in your apartment. Step-by-step guide with expert tips.
Pea Shoots in a Crate: My Secret Weapon for Fresh Greens
Okay, so I've been getting a ton of DMs lately about my pea shoots. Everyone wants to know how I get them so lush and tender, especially when I talk about growing them in those little wooden crates. And yeah, it’s true, I’m kinda obsessed with growing all sorts of greens in wooden crates using NFT hydroponics. There’s something so satisfying about turning a rustic crate into a high-tech growing machine on my fire escape. Today, we’re gonna dive deep into the nitty-gritty: specifically, how I handle the
For those of you just joining the MicroGardenHacks crew, my journey started, oh, about twelve years ago. I was trudging around Portland as a landscape architect, looking at sprawling lawns and thinking, "There has to be a better, smaller way." Fast forward through tiny apartments in Chicago and Brooklyn, and here we are. Pea shoots were one of my earliest victories, truly. They’re forgiving, they grow fast, and they taste like sunshine. What’s not to love?
Why Pea Shoots Do So Well with NFT Hydroponics
Pea shoots. They’re like the hyperactive toddlers of the plant world – they grow super fast, but you gotta keep an eye on them. For an urban gardener, speed is EVERYTHING. We don't have endless rows of farmland; we've got windowsills and fire escapes. NFT (Nutrient Film Technique) hydroponics is basically a fancy way of saying your plant roots get a constant, shallow stream of nutrient-rich water. No soil. Less mess. Faster growth. It’s a match made in heaven for pea shoots.
Think about it: in soil, roots are searching, struggling sometimes. With NFT, it's like room service for their roots, 24/7. They don't waste energy looking for food or water, so they just focus on getting tall and bushy. And for something we harvest quickly, that efficiency is golden. Plus, no soil-borne pests to worry about, which is a HUGE win when you're growing indoors or on a balcony.
What You'll Actually Need
Alright, let's get down to brass tacks. You want to replicate this, right? Here’s my go-to list for a solid
- The Wooden Crate: Don’t overthink this. Any sturdy wooden crate will do. Mine usually come from a local craft store or I salvage them from fruit markets. Just make sure it’s not treated with nasty chemicals. I line mine with heavy-duty pond liner or thick plastic sheeting. Staple it in place, make sure it’s watertight. This becomes your reservoir.
- NFT Hydroponics Kit Components:
- Submersible Pump: A small one, 20-50 GPH (gallons per hour), is plenty for a crate setup.
- Tubing: ¼ inch or ½ inch to connect your pump to your channels.
- Grow Channels (or gutters): This is where the roots spread out. You can buy ready-made NFT channels, but I often hack mine from PVC pipes cut in half lengthwise, or even repurposed rain gutters. Just make sure they fit snugly inside your crate.
- Net Pots: 1.5 to 2-inch net pots. You’ll be germinating your peas in these.
- Growing Medium: I use rockwool cubes or coco coir pellets for starting. You want something inert that holds a little moisture but lets roots easily penetrate.
- Nutrient Solution: A balanced hydroponic nutrient. I’ve had great success with General Hydroponics FloraSeries. Follow the directions for leafy greens and half-strength for seedlings.
- pH Test Kit/Meter: Crucial! Pea shoots like a pH between 6.0 and 6.5.
- Lights: Unless you have a super sunny south-facing window, you need supplemental light. I use LED grow lights, usually full-spectrum ones.
- Oscillating Fan: Air circulation is key for strong stems and preventing mold.
- Pea Seeds: Get good quality, untreated shelling pea or field pea seeds. Don't use dried peas from the grocery store meant for cooking; they're often dead.
The Growing Process, Step by Step (2-3 Weeks!)
Week 1: Sprouting Power!
First things first, soak your pea seeds. I usually do this overnight, for about 8-12 hours. It kickstarts germination. After soaking, I spread them out on a tray for a day or two, covering them with a damp paper towel. You’ll start to see little tails emerge – those are rootlets!
Once you see those rootlets, it's time for the net pots. I fill my net pots with pre-soaked rockwool cubes and nestle a few pea seeds (like 3-5) into each cube. Don't overcrowd them. Then, place these net pots into your NFT channels. Get that pump running, circulating your nutrient solution (at about half strength for now) through the channels. Make sure the water just barely touches the bottom of the net pots.
Light: Immediately get them under the grow lights, 16-18 hours a day. Last March, my first pea shoot batch in a wooden crate got super leggy because I skimped on light – lesson learned! They stretched and fell over, looking pathetic. Don't do that. Give them light!
Week 2: The Growth Spurt
This is where the magic happens. Your pea shoots will be growing rapidly, sometimes an inch or more a day. Keep an eye on your water level and pH. Top off your reservoir with fresh water and adjust pH as needed. You might need to increase your nutrient strength a bit, following the package directions for young plants.
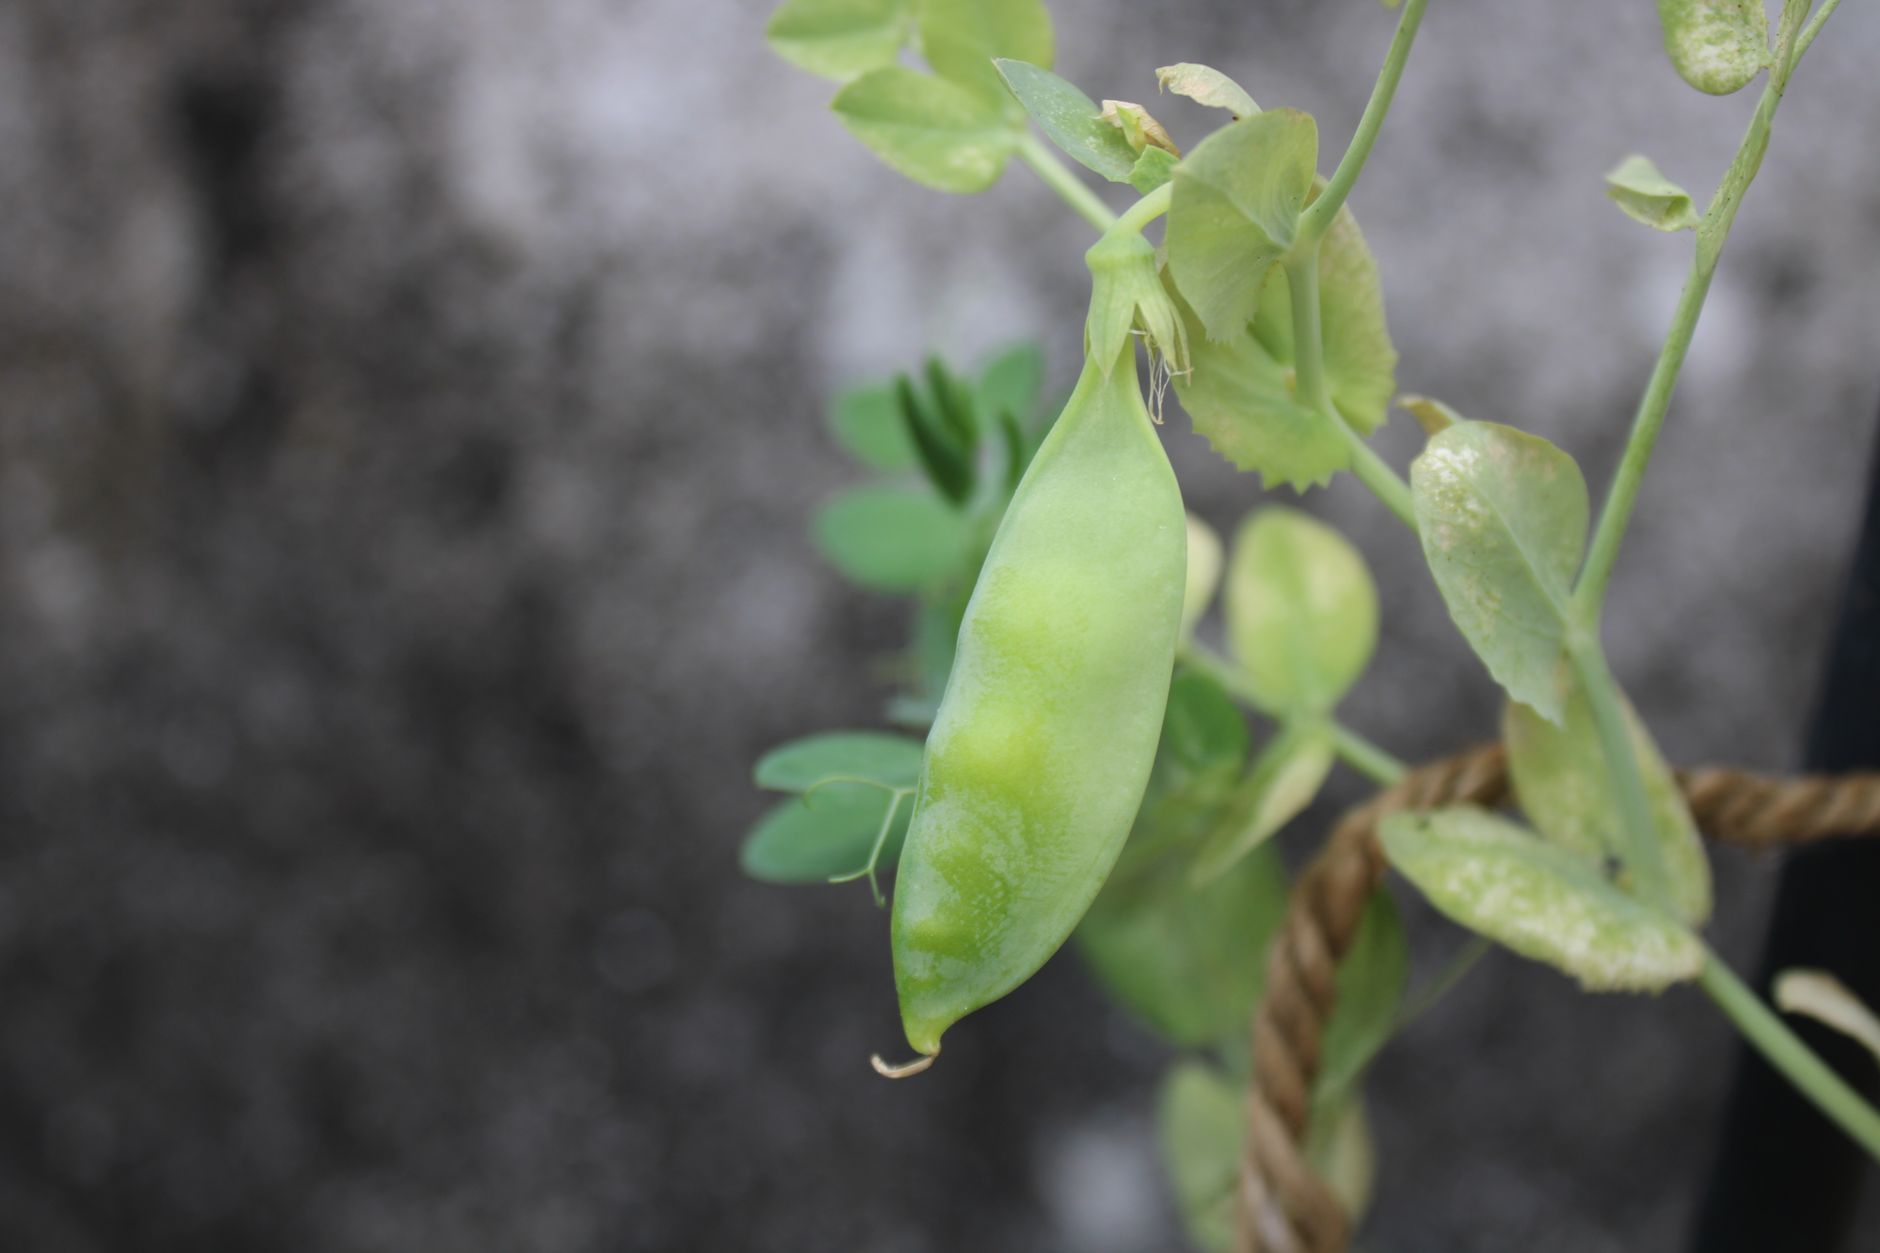
Pruning: This is where the "pruning pea shoots NFT hydroponics wooden crate" bit really comes in. Honestly, I think most beginners overthink this part. For pea shoots, we’re not really "pruning" in the traditional sense of shaping a bush. We're doing more of a "cut-and-come-again" harvest. Once your shoots are about 4-6 inches tall, usually around day 10-14, they’re ready for their first haircut. Use sharp, clean scissors and snip them about an inch above the seed. Leave that bottom inch because, sometimes, they'll regrow for a second, weaker harvest. It’s like giving them a buzz cut.
Air Circulation: Make sure your small oscillating fan is running a few hours a day. This strengthens the stems and prevents damping off or mold issues, especially in a humid environment like a closed-off apartment in early spring. One time, in my old Brooklyn apartment, I forgot to turn on the fan during a particularly muggy April, and I lost half a tray of delicious-smelling shoots to white fuzz. Ugh. Never again.
Week 3: Continued Harvest & End of Cycle
If you're lucky, and you made that clean cut, you might get a second flush of smaller shoots from the same plant stumps. This second harvest is usually less tender and smaller, but hey, free greens! After the second cut, or if they look spent and sad, it's time to compost the old plants and start a new batch. Pea shoots are a quick crop; they're not meant to last for months like a tomato plant.
Mistakes I've Made (So You Don't Have To)
Look, I've killed more plants than I care to admit. It’s part of the process, right? Here are a couple of doozies related to
- Underestimating Light: I already mentioned this, but it bears repeating. Those sad, pale, floppy pea shoots are usually begging for more light. I used a cheap "grow light" from Amazon one winter in Chicago, thinking I could get away with it. My shoots looked like they were trying to escape from a horror movie. Invest in decent lights. It makes all the difference. Check out resources like the USDA's plant hardiness zones (even for indoors, light intensity maps somewhat to natural zones) for ideas on light duration.
- Ignoring pH: This is my rookie mistake. I’d get lazy, assume everything was fine, and then wonder why my plants were yellowing or stunted. Pea shoots are pretty forgiving, but they won't thrive in a wildly out-of-whack pH. Get an affordable pH test kit and use it daily, especially when you're starting out. I learned this the hard way with some angry looking basil trying to grow in high pH water.
- Overcrowding Seeds: More seeds don't mean more plants. They mean more competition, weaker stems, and potentially mold. When I first started, I thought I could jam a hundred seeds into one net pot. Nope. I ended up with a dense, matted mess that quickly died off. Patience, grasshopper.
Little Things That Make a Big Difference
- Warmth (but not too much): Pea seeds like warmth to germinate. Around 70-75°F (21-24°C) is ideal. Once sprouted, they're fine at room temperature.
- Cleanliness: Seriously. Hydroponics is awesome, but it can be a breeding ground for algae and bacteria if you're not clean. Sanitize your channels and reservoir between batches. A little diluted hydrogen peroxide in your reservoir water can help prevent algae. I talk about this a lot in my Stevia NFT Hydroponics troubleshooting guide – those tote systems can get slimy fast!
- Water Filter: If your tap water is heavily chlorinated or has a lot of dissolved solids, consider filtering it. It impacts how your nutrients perform.
- Listen to Your Plants: This sounds woo-woo, but your plants will tell you what they need. Yellowing? Nutrient deficiency or pH issue. Leggy? More light. Drooping? Water/nutrient flow issue. Get to know what healthy pea shoots look like – vibrant green, sturdy, upright.
- Experiment with Varieties: Not all pea seeds are created equal for shoots. Some are sweeter, some are more vigorous. Next time, try a different type of pea seed. You might be surprised!
When to Harvest and What to Expect
You’re generally aiming for that first harvest when your pea shoots are about 4-6 inches tall and have their first set of true leaves (the second pair of leaves that look like tiny pea leaves, not the initial embryonic ones). This is usually between 10-14 days after planting. They’ll have a fresh, sweet, slightly grassy flavor. The texture should be crisp and tender, with a satisfying snap.
When you cut them, snip them just above the lowest set of leaves, or about an inch above the growing medium. This gives them the best chance for a second flush. Sometimes, if you’re super lucky and conditions are perfect, you might even get a tiny third flush, but usually, that second one is it for your
I absolutely adore the freshness pea shoots bring to simple dishes. Toss them in salads, pile them onto sandwiches, or just eat a handful straight from the crate. Trust me, once you grow your own, you'll never buy the store-bought ones again. There's just no comparison.
Keep exploring related guides
Follow the topic cluster below to discover more growing methods, troubleshooting advice, and crop-specific tutorials.