Rooftop Gardening
Beat the Heat! Borage Rooftop Jars for Summer Survival
Learn how to borage rooftop mason jar heat protection in your apartment. Step-by-step guide with expert tips.
Beat the Heat! Borage Rooftop Jars for Summer Survival
Okay, so it’s summer. And if you’re anything like me, your rooftop or balcony in Chicago Brooklyn Portland is basically an oven these days. My little patch of heaven, which felt like paradise in spring, is now channeling its inner Sahara. And let's be real, even plants aren't thrilled with a 90-degree heat index.
But guess what? We’re not giving up. Especially not on borage. That fuzzy-leafed, star-flowered beauty isn't just pretty; it’s a pollinator magnet and tastes amazing in gin and tonics (trust me on that one). Plus, it’s surprisingly resilient, *if* you give it a fighting chance. And that's exactly what we're going to do with some water-wise rooftop gardening, specifically focusing on borage rooftop mason jar heat protection.
I’ve grown borage in everything from old wine crates to fancy self-watering planters. But for summer survival, especially when we're talking about dodging that relentless midday sun, I’ve found a simple mason jar on the rooftop can be a surprisingly effective setup. It’s cheap, reusable, and with a few tricks, it actually works. Let's make sure our borage beats the heat this summer.
Why Borage Does So Well with Rooftop Gardening
Borage, *Borago officinalis*, is a trooper. It really is. It’s got a deep taproot, which is awesome for pulling up nutrients and finding moisture, even in tougher conditions. This plant thrives in full sun, which is great for rooftops, but "full sun" and "scorching inferno" are two different things, right? The key is managing that heat. It’s an annual, so you’re not committing for life, and it grows pretty fast.
I remember one summer in Chicago, foolishly thinking my borage would just power through August in a dark-colored pot. Nope. The roots fried. The leaves crisped. It was a sad, crunchy mess. Lesson learned: container color and material *really* matter for borage rooftop mason jar heat protection. Mason jars, being clear, let light in but don’t absorb heat like some of those darker plastic pots. Plus, you can see what’s happening with the roots, which is pretty cool.
Another thing I love about borage is its self-seeding habit. If you let a few flowers go to seed, you’ll likely have volunteers popping up next spring. It’s the plant that keeps on giving! The RHS website actually has some good info on its hardiness and growth habits. I usually check them out when I’m getting started with something new outside my comfort zone.
What You'll Actually Need
Container: Mason Jar, System: Rooftop Gardening
Alright, let’s get down to brass tacks. Here’s your shopping list. Most of this you probably already have laying around, especially if you’ve dabbled in small-space rooftop gardening like I have.
- Wide-Mouth Quart Mason Jars (2-3): I prefer wide-mouth because it makes planting and transplanting easier. Quart-sized gives the borage enough root room for its relatively fast growth. Don't cheap out on flimsy jars; Ball or Kerr are my go-tos.
- Drainage Material (1-2 inches): This is CRITICAL. Those jars don’t have drainage holes. Use coarse perlite, lava rocks, or even small, crushed terracotta pieces. I usually grab a bag of perlite, it’s light and does the job.
- Good Quality Potting Mix: FoxFarm Ocean Forest. Seriously. I swear by it for starting mixes. It’s got enough nutrients to get things going without being too hot. For borage, you want something that drains well but can retain some moisture.
- Borage Seeds: Baker Creek Heirloom Seeds or Territorial Seed Company are my favorites for quality. Look for organic if you can.
- Small Hand Trowel or Spoon: For scooping soil.
- Misting Bottle: Essential for germinating seeds without washing them away.
- Shading Fabric/Netting (Optional but Recommended): This is your secret weapon for borage rooftop mason jar heat protection. I use a cheap 30% shade cloth from Amazon. Think old sheer curtains or even a light bedsheet in a pinch.
- Watering Can with a Fine Rose: Gentle watering is key.
The Growing Process, Step by Step
Here’s the roadmap for getting your borage from seed to beautiful star-flower, over about 4-6 weeks, even when the sun’s being a bully.
- Week 1: Seed Starting & Initial Setup (The Excitement Begins!)
First, clean those mason jars. Sterilize them if you're feeling fancy, but hot soapy water is usually fine. Add your 1-2 inches of drainage material to the bottom. This creates a reservoir and keeps roots from sitting in stagnant water. Then, fill the jar about two-thirds full with your potting mix. Don't compact it too much; roots like fluffy soil.
Plant 2-3 borage seeds about 1/4 inch deep in each jar. Gently cover with more potting mix. Mist thoroughly until the top layer is damp. You don’t want it drenched, just moist. Place your jars in a spot on your rooftop that gets bright, indirect light for germination – maybe tucked behind a larger plant or under a table for the first few days. Keep the soil consistently moist by misting, especially in summer heat. Sprouting usually takes 5-10 days.
- Week 2-3: Thinning & Light Adjustment (Survival of the Fittest)
Once your seeds have sprouted and you see a couple of true leaves (the second set, not those initial round cotyledons), it’s time to thin! This part always feels a little brutal, but it’s for the best. Snip the weaker seedlings at the soil line, leaving only the strongest one per jar. This ensures your remaining borage has enough resources to thrive. Last March, my first borage batch in a mason jar got leggy because I skimped on light – lesson learned. Don't make my mistakes!
Now, gradually introduce them to more direct sunlight. Move them to a spot that gets morning sun, but is protected from the intense afternoon sun. This is where your shading fabric comes in. Drape it over a makeshift frame or even prop it up with some stakes to create a little shaded canopy over your jars during the hottest part of the day (noon to 4 PM). This proactive borage rooftop mason jar heat protection stops the sun from baking your precious seedlings.
- Week 4-6: Growth & Ongoing Heat Management (Flowering Fun!)
Your borage should be growing noticeably now, putting on more leaves. Continue with that morning sun/afternoon shade routine. The mason jar itself helps insulate the roots a bit, but that shade cloth is paramount. You might also want to try placing the jars on a lighter-colored surface, like a light-colored tile or even a piece of reflective insulation, to deflect heat away from the bottom of the jar. Dark surfaces absorb heat like crazy.
Watering is key here. In summer, especially on a rooftop, plants dry out FAST. Check your jars daily. Stick a finger about an inch into the soil. If it feels dry, it’s time to water. But remember, no drainage holes means no overwatering! Give it a good drink, but watch for any standing water at the bottom; if you see more than an inch pooling, you may need to adjust your watering schedule or even carefully tip out the excess.
I usually start giving them a very dilute liquid feed (like half-strength Alaska Fish Fertilizer) around week 4, every other watering. Borage is a fairly heavy feeder, and in a small container, it’ll quickly use up the nutrients in the potting mix.
Mistakes I've Made (So You Don't Have To)
Look, I’ve killed my fair share of plants. Probably more than my share. It’s how we learn, right? Here are a few face-palm moments with borage specifically:
- Overwatering in an Undrainable Container: My very first go at borage in a pretty glass vase (yes, a vase, I was a newbie) turned into a murky, root-rotted disaster. Mason jars are the same principle. You *have* to be diligent with checking soil moisture before adding more water. Better to slightly underwater than overwater.
- Ignoring the Sun Angles: Moving to Portland from Brooklyn, I completely underestimated the intensity of the summer sun angles here. My rooftop, which felt perfectly angled for spring, ended up being a death trap for anything without shade in July and August. Sunburn is real for plants! Your rooftop tatsoi needs afternoon shade, and so does your borage.
- Skipping the Drainage Layer: Thinking I could just "be careful" with watering and avoid the drainage layer. Rookie mistake. It always leads to soggy bottom soil and unhappy roots. Always.
- Forgetting About Container Material: I mentioned this earlier, but it bears repeating. Dark metal or plastic containers on a scorching rooftop? They heat up unbelievably. Keep it light-colored, or go for the transparency of a mason jar, which at least doesn't absorb the heat as much.
Little Things That Make a Big Difference
- Group Therapy for Plants: Group your mason jars together. Plants create a microclimate when they’re close, slightly increasing humidity and lowering the ambient air temperature around them. It’s like a tiny plant support group!
- Mulching the Top: A thin layer of straw, small pebbles, or even coarse perlite on top of the soil helps reduce evaporation and keeps the soil temperature more stable.
- Reflective Surfaces: If your rooftop is dark, consider putting down some old light-colored towels, a white tarp, or even aluminum foil underneath your plants to reflect light and heat away.
- The “Ice Cube” Trick (Carefully!): On truly brutal days, I’ve been known to put a couple of ice cubes on the soil surface – not directly on the stem – for a slow, cooling release of water. Do this sparingly, though, you don’t want to shock the plant.
When to Harvest and What to Expect
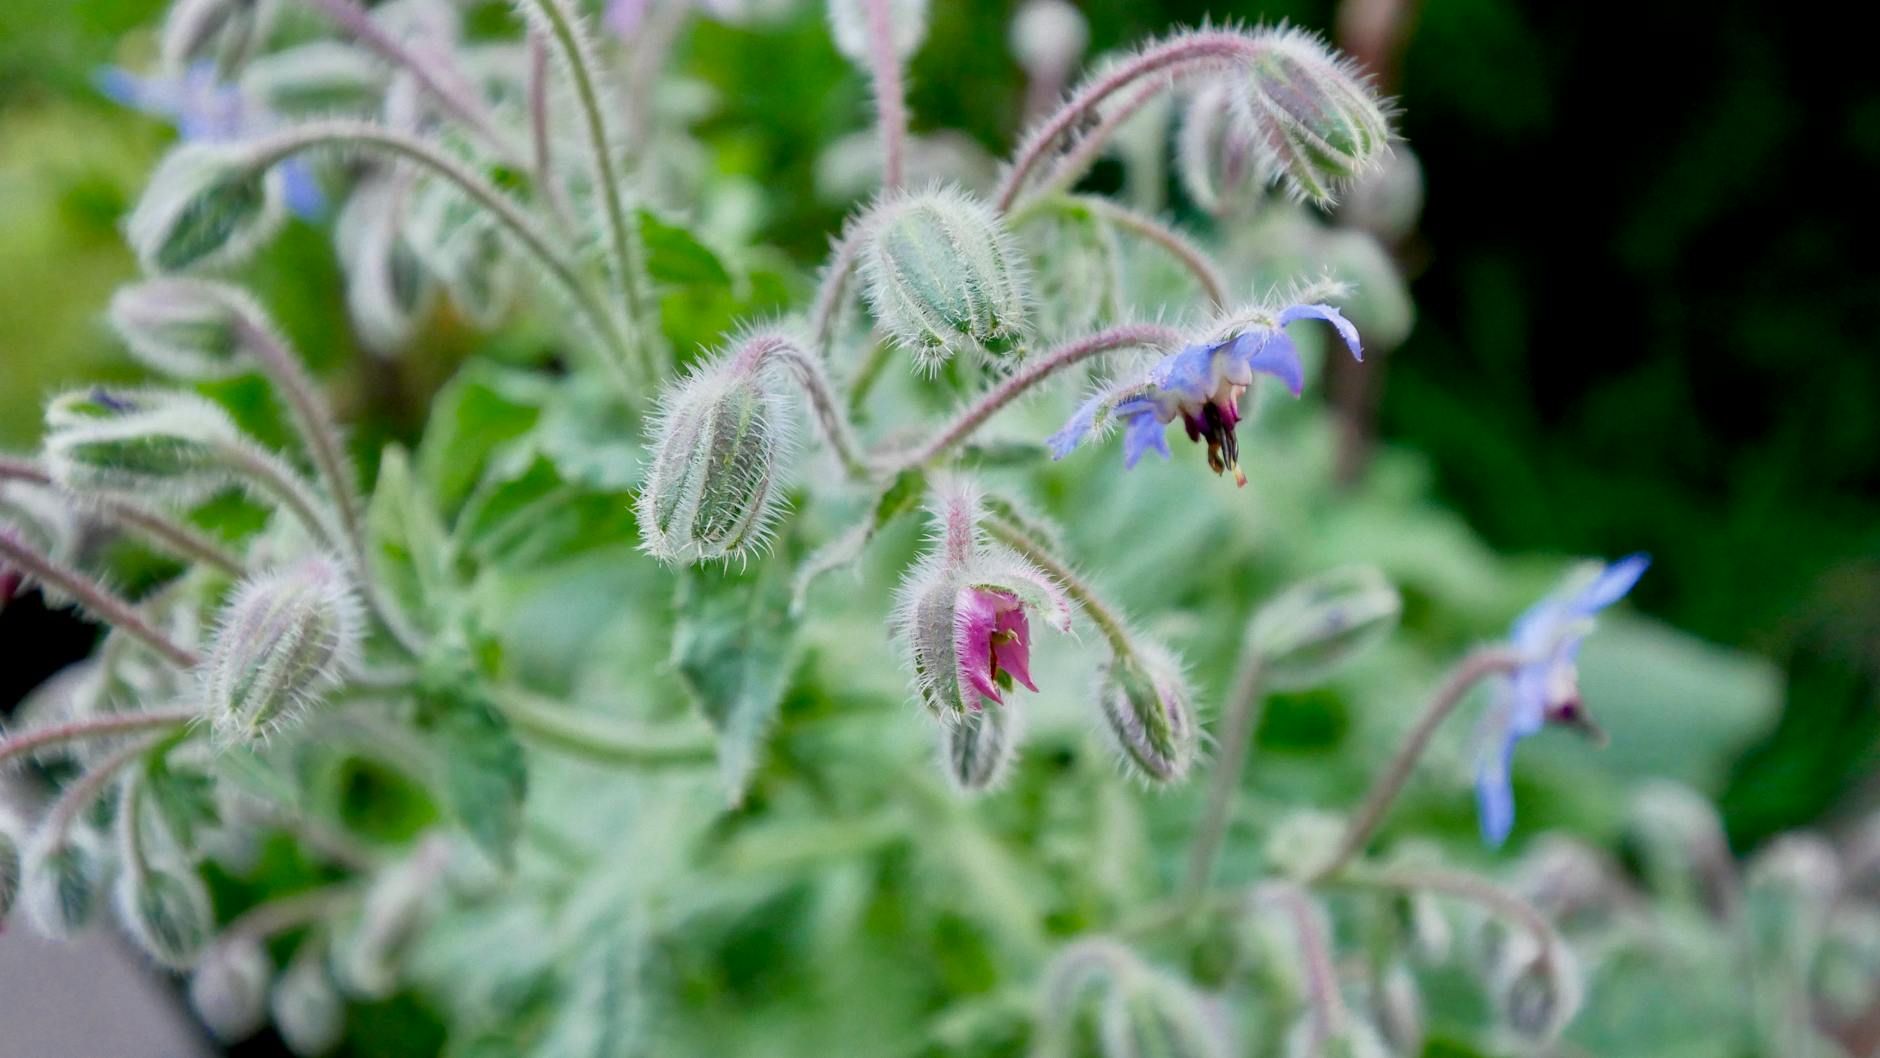
Borage flowers typically appear around 6-8 weeks from seeding. You’ll know it’s borage by the slightly hairy stems and leaves, and those absolutely stunning star-shaped blue (sometimes pinkish-purple) flowers. They almost glow.
You can start harvesting leaves and flowers as soon as the plant is a decent size, usually around 6-8 inches tall. Just snip off outer leaves and flowers as needed. Don’t take more than a third of the plant at once. Borage leaves have a slight cucumber-like flavor, a little briny. Young leaves are best for eating fresh in salads or sandwiches. The flowers are gorgeous garnishes for drinks, desserts, or even frozen into ice cubes. They look spectacular floating in a glass of lemonade!
The plant itself will keep producing flowers through the summer if you keep it watered and happy with its borage rooftop mason jar heat protection. Enjoy the buzzing of the bees and the beauty it brings to your urban oasis!
Keep exploring related guides
Follow the topic cluster below to discover more growing methods, troubleshooting advice, and crop-specific tutorials.